Have you already conquered the legions of hell on … well, Hell, or are preparing to face the final boss on Inferno in Diablo 3? If so, move along. This guide is not for you. In fact, you don’t need any sort of guide, because you’re pretty damn good at the game. Diablo 3 can be very challenging toward the end on Normal and can ramp up in difficulty pretty quickly in Nightmare. This particular guide is meant to help those starting out from the very beginning and to prepare them to face the final boss on Nightmare.
Don’t worry, though, this guide is completely spoiler-free. It’s all about the mechanics, not the story, and I won’t name the bosses. There’s still a lot to go over here, so let’s hop right in.
- Choosing your class
- Picking the right stat
- Elective Mode
- Knowing your enemy
- The Auction House
- Find some friends
- Explore everywhere
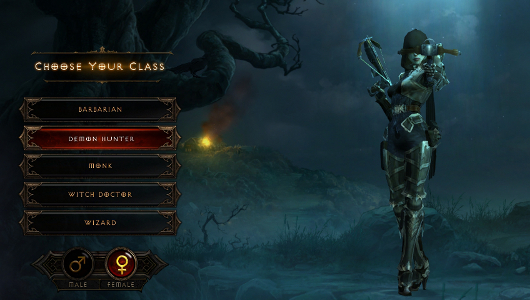
Hey, I said we were starting from the very beginning, and the first thing you need to do is choose your class. While this is absolutely a choice of taste, it’s still important to know what each class is capable of.
The Barbarian and the Monk are the melee fighters, each having abilities to close the distance by leaping toward the enemy or drawing them in close. While the Barbarian is a straight fighting machine, the Monk has quite the arsenal of utility and support skills available, making him more versatile than the Barbarian at the cost of brute strength. The Barbarian’s abilities cost Fury, which should be familiar to anyone who’s played a Warrior in WoW or a plethora of other MMOs. Fury is gained by attacking and being attacked by enemies. The Monk’s Spirit is similar, in that attacking with his Primary attacks regain it, but unlike Fury, it’s usually full and emptied by using his skills.
The Wizard and Witch Doctor are the casters in Diablo 3 but are really quite different. The Wizard has a fast-recharging Arcane energy to fuel her spells, while the Witch Doctor’s spells are fueled by the age-old Mana. The Wizard’s spells focus on damage, (some) support and damage mitigation; the Witch Doctor focuses on summoning the dead or beasts and weakening enemies.
The Demon Hunter is the ranged DPS of the game, utilizing bows, crossbows and the class-specific 1-handed crossbows. She actually uses two different types of energy: the quickly regenerating Hatred and the slower-filling Discipline. Hatred is used to fuel all her damage dealing abilities besides her Primary skills, which regenerate Hatred, while Discipline is used for her support abilities like traps and evasive maneuvers.
Pick a class by your tastes, as each class can play the game solo or group well with others (even others of the same class). Choosing a class based on how you want to play is crucial.
2. Picking the right stat
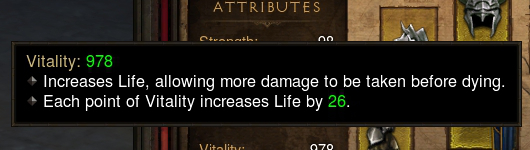
Once you’ve chosen your class, the most important thing to know is what stat you need to look for on gear. There are four major stats: Strength, Intelligence, Dexterity and Vitality. I want to emphasize this as much as possible: Vitality is the one of the most important stats for you, no matter the class.
There are absolutely cases where you want to take your primary stat over Vitality but learning to pay attention to items with Vitality on them early is extremely important. Vitality means more health. While logic would say this is more important for Barbarians or Monks, who are on the front lines, the opposite is actually true. The game is tuned so if a Wizard and a Barbarian with the same exact health, stats and armor values are being attacked, the Wizard will take more damage. This means that Vitality is worth more to the non-melee classes.
Besides Vitality, the primary stats are as follows:
Strength – Barbarian
Intelligence – Wizard, Witch Doctor
Dexterity – Monk, Demon Hunter
Each stat helps each class, but the primary stat is the main damage increase for your class. Strength increases armor, Intelligence increases resistances and Dexterity increases dodge chance.
3. Elective Mode
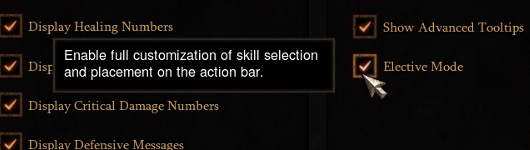
The Elective mode is an option hidden inside the menus that dramatically changes the way you play and is an absolute must for anyone who wants to get the most out of their character. To enable this mode, head into your ESC menu, then options, choose gameplay, and the Elective mode check box should be on the right hand side. This allows the player to pick and choose skills to assign to their action buttons at their whim, instead of being locked into the default method only choosing one skill per category. For example, if you really like two of the Primary skills, you can assign one to the left mouse and another to the right mouse, and opt out of a category you’re not particularly fond of.
This is a very important option to turn on, but it should also be ignored in the early going. You should try every skill you get, and I think it’s important early on to follow Blizzard’s method and replace old skills with new ones from the same category before going all out and customizing your action bar to its fullest potential. The more familiar you are with your skills and how they mix will give you a much better idea of how you want to play your character later on. If you ignore a skill early on, you may not realize its potential or usefulness in the late game.
4. Knowing your enemy
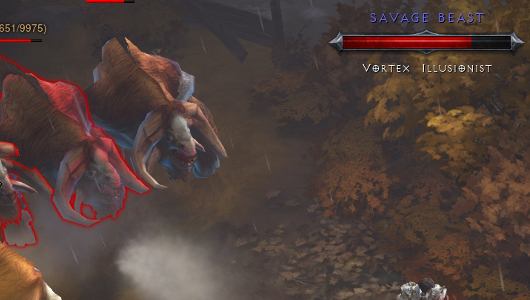
While the majority of the foes you’ll face in Diablo 3 are nameless minions, you’re going to be coming across special monsters more and more frequently as you go through the game. Champions are creatures with a blue aura around them and spawn in packs, while Rares have a golden aura, a special name (some players call these “named creatures,”), and a group of minions that share Rare traits. What sets these creatures apart from the others is that they have special abilities that you can identify by looking underneath their name at the top of the screen.
In the Normal difficulty these enemies have only one special ability. In Nightmare they have two, three in Hell and four in Inferno. From what I’ve seen, they can get any combination of abilities, and if you look at the list below, it can get pretty scary.
Here’s a list of types you can expect to see and some basic strategies for dealing with them.
Arcane Enchanted – The monster can summon an orb which has a beam of Arcane energy that rotates around it and deals heavy Arcane damage to the player. These can do crazy amounts of damage to you in a short amount of time, but there are a couple of seconds where you see the orb before the beam appears. The strategy is simple enough: get away from the orb as soon as you can. These monsters also deal some extra Arcane damage when attacking, but it’s nothing too bad.
Desecrator – A monster with desecrator will create a pool of corruption at a player’s feet that will deal a lot of small damage very quickly. If you’re not paying attention, one of these pools can deplete your life at a very rapid rate, but they are easy to avoid if you know what to look for. There’s really no strategy for this one; just step out of the pool when you see it, and pay attention to where your character is standing when a desecrator is around.
Electrified – These monsters deal a bit of extra lightning damage when attacking and also have more lightning resistance than normal, but most importantly, they send out seemingingly random shots of electricity along the ground. Ranged characters will be able to avoid the electricity, but melee characters won’t have much of a chance to get out of the way. Luckily, the electricity seems to do minimal damage, so players with a decent amount of health shouldn’t have too much trouble. Just use non-lightning attacks to down these foes quickly and watch out for the orb they leave behind when they die that shoots out some more electricity.
Extra Health – Simple, and not too much of a pain, monsters with the Extra Health ability have … extra health. Sadly, this ability doesn’t show up until you start Nightmare and, therefore, is always paired with something more devious.
Fast – The Fast ability is another one that shows up in Nightmare, and monsters with this ability have faster run speed, attack rate and casting times. This can be especially devastating on monsters that are normally slow or hard-hitting, monsters that can cast powerful spells. As a ranged character, getting away from or kiting these monsters can be quite difficult, and for every character, any snaring or rooting abilities are that much more useful. When fighting a Fast monster, be wary of what they can do normally, since they’ll be doing all that at an accelerated rate.
Fire Chains – Yet another ability that shows up in Nightmare, the Fire Chains only seems to show up on Champions, as they usually spawn in groups of three or four. These monsters have chains of fire that bind them to each other that will deal a good bit of damage to players who come in contact with them. The best strategy for dealing with the Fire Chains: take them out one at a time and don’t let them surround you.
Frozen – Creatures with this ability will randomly shoot out frozen orbs that will explode after a few seconds and freeze any player caught in the blast. While this ability is a nuisance on it’s own, it’s downright terrifying when paired with a more deadly ability. Having your character frozen in place while the enemy is free to do whatever they want to you isn’t something you want to happen. When you see these orbs on the ground, run away from them as soon as possible. It’s a smart idea to save any escape ability cooldowns or some energy to use your escape abilities when you come up against a Frozen monster.
Horde – This ability shows up in Nightmare and only on Rare monsters. A Rare monster with Horde will spawn with many more minions than normal, and all those minions (like normal Rare minions) will share the Rare’s second trait. Imagine 10 or more creatures shooting mortars at you, running around with increased speed or summoning Arcane orbs. This is one of the easiest and most satisfying abilities to deal with, as more creatures mean more XP and loot, but it can also be incredibly scary when paired with certain other abilities. The best advice I can give for dealing with a Horde is to spam as much AoE (Area of Effect) as possible to kill as many of them as quickly as you can. Use extra caution when you find a Horde.
Illusionist – This ability shows up late in Normal, and a creature with it can create a clone of itself. I don’t know what the exact specifics of the clones are, but they seem to die a bit quicker than the original monster yet can be just as deadly. Like the Horde, the best strategy for dealing with Illusionists is to use as much AoE as possible to deal with the clones.
Jailer – One of the most annoying abilities available to monsters, the Jailer can freeze the player in place for a brief amount of time. While it deals no damage, you can imagine what being frozen in place can mean for you on higher difficulties. Since you’re only frozen for a small amount of time, using any sort of invincibility spell like Diamond Skin can save your skin. Witch Doctors in particular can use Spirit Walk to get out of the trap.
Knockback – The Knockback ability is more annoying to melee classes than it is for the ranged ones. A monster with Knockback will launch the player in the air quite a few yards. The player will be slower upon landing. Ranged characters should deal as much DPS as possible to take these brutes down while melee fighters should save any distance-closing abilities for when they get knocked away. By itself, the Knockback ability isn’t too much trouble.
Missile Dampening – This ability only showed up once for me towards the end of Nightmare on a Rare creature, and it wasn’t too bad. A creature with Missile Dampening has a red circle around it in which any missiles will slow down to 50% speed. It doesn’t seem to have any effect on the damage of the missile whatsoever, so it’s more of a minor annoyance than anything. Melee characters likely won’t have any negative effects, and ranged characters will only be slightly annoyed.
Molten – One of the worst monster abilities in the game, and also one that shows up early, creatures with Molten have a few special abilities. The first thing you’ll notice is that these creatures leave behind a trail of lava behind them that will deal damage to the player if they get close. These creatures also do a little bit of extra fire damage when they attack, but most importantly, these creatures leave behind fire bombs when they die that explode after a few seconds and do an extreme amount of damage to any players caught in the blast. There isn’t much strategy here besides staying away from the lava trails and booking it away from the monster as soon as they die.
Mortar – This is the ability that I hate the most in the game, although in writing it doesn’t seem that bad. Monsters with the Mortar ability will shoot heavily damaging fireballs in an arc toward the player. By themselves these are easy to avoid, but it becomes devilish on Nightmare. Pairing this ability with Fast, Jailer, Frozen or Horde makes it nigh impossible to deal with, at least when I was playing as a Demon Hunter. I’ll never forget walking around a corner, seeing a Horde Mortar and losing 20,000 life in a matter of seconds with only a slight chance to actually do anything about it. The best advice I can give for fighting a Mortar is to keep on the move and keep underneath the arc.
Nightmarish – A creature with Nightmarish has a chance to send the player running in a random direction for a few seconds with any melee or ranged attack. The best strategy for dealing with these creatures is to take extra care to avoid their attacks, even if you would have no problem taking them normally. Sometimes the fear debuff won’t do much more than annoy you, while other times you’ll aggro a new group of enemies to deal with or open yourself to the creature’s other special abilities on the higher difficulties. Like Knockback, it’s not a bad idea for melee fighters to save their distance-closing techniques for when they get feared.
Plagued – These creatures are more annoying for the melee classes than for ranged. A creature with Plagued will lay down pools of poison around them that will put a stackable DoT (Damage over Time) debuff on the player. The longer you stand in it, the more stacks of damage you’ll take, which isn’t good. Ranged characters should simply stay away from these pools and attack, while melee characters would be smart to kite the creatures away from the pools. This can be difficult when a caster has Plagued.
Reflect Damage – This one is self-explanatory and just as annoying as it sounds. A creature with Reflect Damage will reflect a percent of any damage you do to it back at you. By itself, it doesn’t seem to do too much damage, but when coupled with the monster’s attacks or another ability, it can become pretty scary. The advice I’ll give here is to avoid any AoE spells, especially if you see a Horde Reflect Damage. If you use an AoE on a group of creatures with this ability, you’ll take some damage back from all of them. So you can imagine if you hit a Horde with an especially powerful AoE, you’re going to do a large amount of damage to yourself.
Shielding – Monsters with Shielding begin to appear toward the end of Normal, and while it’s one of the simplest abilities, it’s one of the harder ones to deal with. These monsters randomly gain a shield around them, which makes them immune to all forms of damage. From what I can tell, no amount of damage breaks the shield, so the only strategy is to ignore any monster using the Shielding ability and attack another. Shielded monsters are still vulnerable to crowd control like the Demon Hunter’s traps, so it’s a viable strategy to try to control the ones that are shielded to keep them away.
Teleporter – This one’s pretty self explanatory. A creature with the Teleporter ability can blink around the battlefield and will use the ability to its best advantage. Melee monsters will teleport into melee range and ranged monsters will use the ability defensively to teleport away from players. I’ve also seen these creatures teleport away when low on health. Ranged characters should use their snaring and rooting abilities to keep these creatures controlled and in damage range for as long as possible; melee characters should save their distance-closing abilities for when they teleport away.
Vampiric – Monsters with the Vampiric ability heal themselves by dealing damage to you. This can make them especially difficult to kill if they’re doing a lot of damage to the player. If you see a Vampiric monster, the best advice I can give is to hit them hard, hit them fast and try to kill them as soon as you can. Focus your damage on one monster at a time and take them down before they have a chance to heal.
Vortex – The opposite of Knockback, Vortex is especially annoying to ranged characters. A monster with this ability will periodically grab the player and pull him or her into melee range — sometimes right into the middle of a group of enemies. If you’re a melee character with a good bit of health, this will be a nuisance but not too much trouble. For a ranged character, this can mean a quick and swift death out of nowhere. As a ranged character, save any invulnerability or escape abilities for when you get grabbed by the Vortex monster.
Waller – One of the more annoying abilities in the game, Wallers will create stone walls to stop players from attacking the monster or even create them to stop players from escaping their attacks. From my experience these walls are completely indestructible, though they crumble after a short amount of time. If a Waller has a Demon Hunter, Wizard, or Witch Doctor trapped, they should be able to use Vault, Teleport or Spirit Walk, respectively, to get past the monster. Barbarians can use Leap to jump over the walls to either attack the monster or get away if things are going badly.
That’s about it for the special monsters in the game. It’s a long list, but one that would be useful for someone who is just starting. There are some more that show up on Hell and Inferno difficulties, but you shouldn’t worry yourself with them now.
5. The Auction House
We’re talking about the gold auction house, not the real-money auction house. I would never suggest you spend your hard-earned money on a virtual piece of loot. Some people might have moral reasons for not wanting to go to the auction house to buy their loot, and they have a point. Diablo in its essence is about venturing deep into dungeons, fighting your way through hordes of enemies and claiming the loot for yourself. That’s the way I looked at it until I started fighting hordes of Elites and Champions on Nightmare and getting my butt handed to me because the loot I was finding was full of stats I couldn’t use.
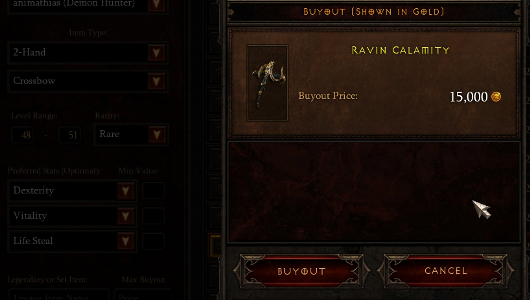
So I went to the auction house menu, plugged in what item and stats I was looking for, set the buyout maximum to a fraction of what I could afford and there was a whole new world of possibilities in front of me. I noticed that I hadn’t upgraded my weapon in over 10 levels, mainly because the crossbows and bows that were dropping for me all had way less vitality or too much strength or intelligence to make the slight DPS upgrade worthwhile. But after a second in the auction house, I was looking at a list of completely affordable crossbows at my level with all the stats I cared about on them. You might think that makes the game too easy. A champion with Horde and Mortar that kills you in 2.5 seconds says otherwise.
So the tip there is simple: Don’t shun the in-game auction house if you want to play all the way through Nightmare and onward. You may be a very lucky person and have all the loot you need drop all the time, but the chances of that seem minuscule. Even having said all that, I still say to stay away from the real-money auction house (unless you’re selling to some poor soul). Spend that $1 on a cup of coffee instead.
6. Find some friends
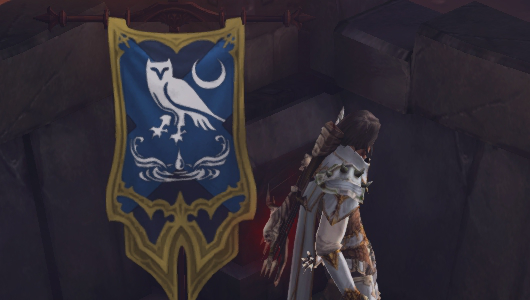
While there seems to be some nefarious activities going on with people joining public games, that shouldn’t scare you off from finding people from your favorite community to play with. While grouping up does make the monsters stronger, it also gives you that much more flexibility to play the way you want and still have all your bases covered.
It also helps that in the Normal and Nightmare difficulties, the enemies only gain extra health, while on the Hell and Inferno difficulties, they also gain a buff to their attack damage. So as long as you’re sticking together, a group shouldn’t have too much trouble through Nightmare.
Also, if you have an even slightly coordinated group that is talking over Skype or one of the many similar clients out there, mowing down enemies through Normal shouldn’t be a problem at all … until you start drastically out-leveling your gear. Then again, a group of 4 people has a much better chance of finding gear that will suit someone in the group, so the odds of getting decent gear rise when partying up.
If you’re looking for some like-minded folks, head over to the forums and check out the Big Red Barrel Battletag List!
7. Explore everywhere
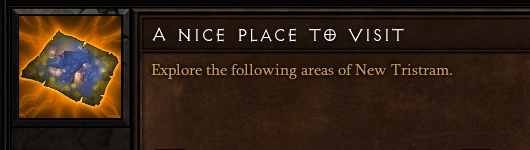
The final piece of advice I’ll give to anyone playing Diablo 3: Explore every inch of the map. While you don’t necessarily have to uncover the entire map, I’ve seen some players want to just run through the game as quickly as possible and become completely under-leveled for the content. Exploring as much of the map as possible is a great idea because it will net you more enemies, more loot and more achievements. I’ve been in the position where I had a portion of the map the size of my pinky nail left to explore. When I got there, I found a Rare monster guarding a Resplendent chest. It pays to explore.
That should do it. If you’re just starting out, I hope you found something to help you start your journey through Sanctuary. If you have any tips of your own to throw out, or take any issue with mine, sound off in the comments below or join the forum discussion. Just please leave it spoiler-free! It’s quite a story, and I think that people will want to see the twists and turns for themselves.


Arioch
Excellent guide with some good pointers
Amanda
Fantastic guide for those looking to get their feet wet in the game but have no experience with Diablo’s mechanics, both previous and current.
I’ll be sending this to a few friends to convince them to play.
Thanks Matthew!